YOU ONLY GET ONE LIFE - MAKE THE MOST OF IT!

Saturday, 25 September 2010

WARM UP - Specific to what you are going to do!

Warm up is a theme coaches and trainers have debated and discussed for years. RAMP is a common acronym when discussing warm up, and the letters stands for - Raise, Activate, Mobilise and Potentiate. In simple terms the warm up is there to prepare your body for what you are going to do next! If you are playing football, basketball, rugby etc this will involve a lot of running and a lot of change of direction, so to raise the body temperature, heart rate and mobilise the joints is crucial. Some coaches still use the old line: "Run around the pitch twice". However is running around a pitch twice ticking all the boxes that a warm up should include? I don't think so. How about including some functional mobility exercises as part of the warm up to make sure your joints have been taken through range of movements they are likely to be working through in training/match?

I think that mobility exercises as part of anyone's warm up is underrated. I will therefore describe some simple mobility exercises that athletes can include as part of their warm up whether this is for a team sport or before lifting weights in the gym.

Type: Mobility warm up exercises to prepare the body for exercise
Purpose: To improve blood flow to the working muscles and increase mobility of the joints
Suitable for: Tennis players, team sports and individuals
Equipment needed: Mini resistance band
Repetitions and sets:
1-2 sets per exercise
10 - 15 repetitions per exercise

1. Hamstring walkouts

Start by standing with your feet at hip width apart
Lean your upper body forward without bending your knees and touch the floor (if you have tight hamstring you can bend them slightly) (Picture 1)From this position walk yourself forward by using your hands until you get to a press up position (Picture 2)
From this position walk your hands back till your hands touch your feet and repeat
Your feet stays still throughout the exercise
Keep your hips still and avoid rocking too much from side to side
Perform this movement 10-15 repetitions

2. Lunge with twist
Start by standing with your feet about hip width apart on the floor
Pull your abdominals in and keep your chest out prior to starting
Let your hands rest comfortably on the side of your body
Step forward in a lunge position by bending both knees is in line with your ankle
Your front knee should not cross the line of your toes and your back knee should just touch the floor gently
With the hand on the same side as your front leg touch the inside of your front leg(Picture 1)
The other hand opens up outwards and make a half circle
Push your front leg back up and step back to the starting position, repeat with the other leg
Remember to always touch the front foot with the hand on the same side as the front leg
Repeat 8-12 steps on each leg

3. Squat, touch toes, hands up and stand up
Start by standing with your feet about hip width apart
Front this position lean forward and touch the inside of your big toes without bending your knees (if you have tight hamstring muscles you can bend them slightly) (Picture 1)
While holding onto the inside of your foot, squat down by bending your knees till your bottom is in line with your knees (Picture 2)When you get into this position, lift one hand up above your hand (Picture 3) and then the other hand (Picture 4)You can then straighten your knees, stand up into the starting position and repeat(Picture 5)
Make sure you keep the weight onto your heels throughout this exercise
Repeat 10-15 times

4. Side lunges
Start by standing with your feet about hip width apart on the floor
Pull your abdominals in and keep your chest out prior to starting
Lift your arms in front of your body till about chest height
Step out till the side with your right leg by bending your right knee.
Keeping your arms in front of your body to counterbalance and make sure your knees are pointing forwards
Stick your bottom back and keep your chest out while getting into the position (Picture 1)
From this position, drive your right leg back by pushing it off the floor into the starting position and repeat
You can alternate from side to side or do all your repetitions on one leg before changing to the other
Do 8 – 12 repetitions on each leg


5. Press up position to rotation

Start on the floor in a press up position with your elbows in line with your shoulders
Keep your abdominals pulled in prior to starting this movement
From this position, lift your left hand off the floor and make a half circle by rotating to the left (Picture 1)You left hand should be in line with your body when looking from the side
Rotate your body back down to the starting position and repeat on the other side
Do 8-12 repetitions on each side

6. Spiderman

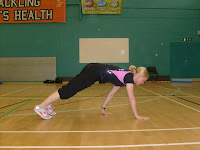
Start on the floor in a press up position with your elbows in line with your shoulders(Picture 1) Keep your abdominals pulled in prior to starting this movement
Bend your right knee and take a step forward with your right leg, place your right foot next to your right hand
To increase the stretch behind your lright leg you can touch the left elbow down onto your left foot (this is optional)
Lift your left leg back to the starting position and repeat on the other side
Do this 10 – 15 repetitions on each leg

7. Glut bridges

Start by lying onto your back on the floor
Bend your knees by placing your heels in line with your knees (half a foot away from your bottom)
Rest your arm by the side of your body (Picture 1)Lift your hips up by squeezing your bottom till your back is straight (Picture 2)Hold this top position for 5 seconds and lower your hips back down to the floor and repeat
Do this 10 -15 repetitions
8. Windmill
Start by standing with your feet about 1 metre apart
Bend your upper body forward by slightly bending your knees
Touch your right hand on the outside of your left foot (Picture 1)Change over and touch the left hand on the outside of the right foot and repeat for 10—15 repetitions
Keep your chest out throughout this exercise


9. Hip flexion with mini resistance band

Start by laying on your back with the resistance band around the top of your feet (point your toes upwards to make sure the band doesn’t come off) (Picture 1)Bend right hip by bringing your right knee towards yourself till your hip is at approximately 90° (Picture 2)Keep the right leg straight while moving the left leg
Bring the left leg back down by straightening your hip and knee and repeat with the right leg Repeat this 10-15 times on each leg
10. Shuffles with mini resistance band (forwards, sideways and backwards)

Start by placing a mini resistance band around both knees together
Stand with your feet hip width apart, with a small bend in your knees prior to starting
Take a step forward with left leg, then move the right leg close to the left leg (Picture 1)Now move the right leg forward before moving the left leg close to the right leg etc.
To move the front leg you have to abduct (bring the leg out) the leg against the resistance band, which means you should face sideways slightly before starting
Always remember to bend your knees and keep your chest out when doing these movements
You can also walk sideways (Picture 2) and backwards with the band (Picture 3), by changing the starting position
If you alternate between the 3 different movements you can perform this for approximately 5 minutes
Thanks
Monica

Sunday, 19 September 2010

The Gym Induction Video is now complete!

As I mentioned in a previous blog post, I have been responsible for producing the new Gym Induction video for Leeds Metropolitan University. The filming took about 6-7days to complete and we filmed over 6 hours in total, so the Leeds Met film crew have done a good job editing to get the whole film below 40 minutes. Johnny- the model has also done a great job, thanks for your effort Johnny. The video is now on youtube for everyone to access so I thought I could share it with my viewers to watch here. Take a look and see what you think, it may give you a reminder on how to use some of the gym equipment. Enjoy!


Cheers

Monica

Monday, 13 September 2010

Tennis Injury Pre/Rehabilitation - Ankle Mobility, Strength and Proprioception

Today I have chosen to post a program with focus on ankle pre and rehabilitation. I have personally experienced the importance of strong ankles from my experience as a football player, but also with the tennis and badminton players I work with. Twisted ankles are a common injury in any sport where sudden change of direction is crucial. If you have twisted your ankle once, I am sure you have noticed that it is easier to twist it again, again and again. However the chance of this reoccurring can be reduced if you go through a good rehabilitation protocol and make sure your muscles and ligaments around your ankles get stronger. Unfortunately there is no easy fix to this except taping your ankle so you can't move properly, but this should only be a short term solution as this will not make your ankles any stronger for the future. For this simple reason I advice athletes to strengthen their ankles to reduce the risk of losing valuable training time because of a “stupid” ankle sprain.

Here are some general guidelines you should read before you get started:
Type: Ankle exercise to improve mobility, strength and proprioception (balance)
Purpose: To improve ankle mobility, strength and proprioception
Suitable for: Any athletes wanting to reduce the risk of ankle sprain
Equipment needed: A foam roller, a step or some stairs, a chair, a resistance band and an exercise mat
Repetitions and sets:
3 sets per exercise
10- 15 repetitions per exercise
120-180 seconds recovery between sets


1. Foam rolling on your calves


· Start by sitting on the floor
· Place your calves on top of the foam roller, start just above your Achilles tendon
· Place your hands behind your back to hold yourself off the floor
· Roll your calves on the foam roller, start above your Achilles tendon (Picture 1) to the back of your knee (Picture 2)
· If you find a tender spot, apply a bit more pressure and roll back and forwards over the tight spot
· To increase the pressure further, cross one leg on top of the other so you only have one calf on the foam roller at the time
· Roll for 45 - 60 seconds on each calf

2. Calf raises


· Start by standing onto a step or onto some stairs
· Position yourself at the end of the step so your heels are hanging over the edge of the step (Picture 1)
· Grab hold of something firm next to you to keep the balance
· Use your toes to push yourself up so your heels lift above the step
· Lower yourself down so your heels are below the step, push yourself up and repeat (Picture 2)
· All the movement should be through your ankle joint

3. Ankle mobility against a wall
· Start by position yourself in front of a wall

· Place one foot in front of the other about 20 – 30 cm from the wall
· Place both hand onto the wall about chest height for support
· With the front leg, touch the knee against the wall by bending your knee
· Then straighten your leg back to the starting position
· Make sure your heel don’t lift off the floor throughout the movement- if you need to lift your heel off the floor place your foot slightly closer to the wall
· Your toes should point forward throughout the exercise
· Do 8-10 repetitions straight ahead, then 8-10 repetitions to each side (your foot should still face forwards, only the knee angle changes)


4. Balance on one leg
· Start by standing on the floor with your feet hip width apart (ideally this should be done in socks or barefoot)
· Place your hands on your waist for support
· Lift one leg of the floor so you are now standing on just one leg (Picture 1)· Have a slight bend in the knee on the leg you are standing on
· Hold your balance for 30-40 seconds
· When you are done with one leg, change over to the other leg and repeat
· To make this slightly harder, hold your arms to the side and move your head from side to side whilst holding your balance (Picture 2)· You can start closing your eyes when this exercise feels easy

5. Hop and hold
·
Position yourself somewhere you have enough floor space in front of you
· Imagine you have a square with 4 smaller squares in front of you (each square around ½ metre long)
· Lift one leg of the floor so you are now standing on one leg
· Have a slight bend in the knee on the leg you are standing on (Picture 1)
· Jump on one leg into the first square in front of you, you should bend in your knee to secure a smooth landing
· Hold this landing position for 2-3 seconds, then jump sideways into the square next to you
· You then jump backwards into the square behind you, then sideways into the square you started in
· Repeat 3 rounds with each leg (this is one set). Do this 3 sets
· Make sure you keep your chest out to avoid your upper body dropping too far forwards and try to make the landings as quiet as possible
· You can hold your hands in front of you to counterbalance


6. Ankle plantar flexion with resistance band
·
Start by sitting onto a chair with a resistance band in your hands
· Grab the resistance band with one end in each hand
· Place the resistance band around the balls of your right foot and pull the band in towards you to create tension (Picture 1)
· Start with your ankle to 90° (toes pointing towards the ceiling)
· Now push the toes down against the resistance band till your toes are pointing forwards (Picture 2)
Then lift your ankles up to the starting position
· Do 10-15 repetitions on one leg, then change leg and repeat

7. Ankle dorsi flexion with resistance band
·
Start by attaching the two ends of the resistance band around something firm around ankle height (a table etc)
· Start by sitting onto a chair with in front of where you attached the band
· Place one foot on the inside of the band so the band is tight over the front of your foot (Picture 1)
· Sit yourself back further to create more tension in the band if necessary
· Pull your foot back towards you against the resistance band by moving your ankle toward you to 90° (Picture 2)
· Then return to the starting position
· Do 10-15 repetitions on one leg, then change and repeat with the other leg


8. Ankle inversion with resistance band
· Start by sitting yourself onto a chair and hold the resistance band out to the side next to the leg you are working
· Place your foot inside the band so the band is around the inside of your foot (around mid foot)
· The leg you are working should be bent from the knee and the sole of your foot should face down prior to starting
· Turn your foot inwards by moving your ankle against the resistance band (try to only move the ankle) (Picture 1)
· Then return to the starting position
· Do 10-15 repetitions on one leg, then change and repeat on the other leg


9. Ankle eversion with resistance band
·
Start by sitting yourself onto a chair and hold the resistance band out to the side furthest away from the leg you are working
· Place your foot inside the band so the band is around the inside of your foot (around mid foot)
· Place your outside foot inside the band so the band is around the outside of your foot (around mid foot)
· The leg you are working should be bent from your knee and the sole of your foot should face down prior to starting
·Turn your foot outwards by moving your ankle against the resistance band (this is only a small movement) (Picture 1)
· Then return to the starting position
· Do 10-15 repetitions on one leg, then change and repeat on the other leg

This is simple exercises you can do without needing much equipment or time. You can do it in front of the TV, whilst cooking your tea or whenever it suits you best. Either way you choose to do it, I am sure your ankles will get stronger!

Good luck!
Monica

Sunday, 12 September 2010

Tennis Injury Pre/Rehabilitation programs- Core Training

Over the last 12 months I have been involved with the students' tennis program at Leeds Metropolitan University. I have been responsible for designing some of the injury reduction programs for a variety of age groups. I have during the last few weeks written down a selection of exercise programs for the different joint of the body that I will be sharing with you on my blog. Today I have chosen to post a program with focus on basic core exercises, with a description on how to perform the exercises and some pictures to make it easier to perform. The exercises outlined underneath are general and can therefore be performed by any athletes; however the exercises selected are aimed at beginner athletes wanting to improve their core control (in particular tennis players).

Here are some general guidelines you should read before you get started:


Type: Strength exercises to improve core control and core endurance
Purpose: To improve core control and core endurance
Suitable for: All tennis players
Equipment needed: Exercise mat, medicine ball (app. 2-4 kg), resistance band
Repetitions and sets:
3 sets per exercise
10- 15 repetitions per exercise
120-180 seconds recovery between sets

NB! Please be aware that isometric exercises can lead to an increase in blood pressure and may therefore not be suitable for people with hypotension.


1. Front plank (isometric exercise)

· Start with your toes, elbows and forearms on the mat
· Your toes should be placed shoulder width apart and your elbows shoulder be placed under your shoulder
· Make sure your abdominals are pulled and that your hips are parallel to the floor throughout the exercise
· There is no movement during this exercise
· Hold this position between 20-60 seconds (without letting your hips drops or raise up)
· Rest on the floor for 120-180 seconds between your sets and repeat 3 sets

As you can see you don't have to use a mat, but it makes it more comfortable for you elbows.


2. Side plank (isometric exercise)
· Start with your right forearm flat on the mat (in line with your shoulder)
· Stack your feet on top of each other
· Lift your body on to your forearm and the side of your right foot (only the right foot is in contact with the mat)
· Work to have a straight line between your head and feet
· Rest your left arm by the side or lift it straight up towards the sky
· Hold this position without letting your hips drop down between 15-40 seconds
· Turn around and repeat on the left side
· Aim to do this 2-3 times on each side, progress the time you are holding to make it harder


3. Aleknas

(You can just ignore the weight on the pictures as this is a progression of the exercise. You can start off with no added weigths initially)


· Start by laying flat on the mat with your legs straight on the floor and arms straight above your head (Picture 1)
· Prior to starting this exercise make sure you pull your abdominals down to the floor and keep this throughout the exercise
Touch your knees with your hands by lifting your arms and legs of the floor at the same time (Picture 2)
Keep your arms straight, but bend your knees as your hands touch your shin
· Straighten your arms and legs back at the same time without touching the floor and repeat the exercise (Picture 3)
· Make sure your head and back remains on the floor throughout the whole movement

4. Leg drop on the floor

· Start by laying flat on the mat with straight legs and arms resting by your side
· Prior to starting this exercise make sure you pull your abdominals towards the floor and keep this throughout the exercise (avoid arching your back)
· Lift both feet off the floor together till they vertical from the floor (Picture 1)
· Lower your feet down as far as you can without letting your back come off the floor. You should stop the leg drop when your back lifts off the floor!
· If you are able to drop your legs all the way to the floor, stop the movement just before your feet touch the floor
· Bring your feet back to the starting position and repeat

5. Straight arm sit up with medicine ball

· Start by laying flat on the mat with straight legs on the floor and arms resting by your side
· Grab a medicine ball (2-4 kg) in your right hand
· While laying on the floor, lift your right hand with the medicine ball straight up in the air next to your head (Picture 1)
· Rest your left hand on the side of your body
· Curl yourself up by leading the movement with your chest, while keeping the right arm (with the ball) straight all the way through the exercise until you are sitting upright (Picture 2)
· Reverse the movement and come down to the floor while still keeping your arm straight
· Focus on lifting your upper body up, rather than forward like you would do in a curl, lead the movement with your chest
· Focus on pushing your legs down to the floor throughout the exercise
· Repeat this exercise 6-10 times with each arm

6. Medicine ball twist

· Start by sitting on the floor with legs crossed in front of you
· Grab a medicine ball (2-4 kg) with both hands and hold in front of your stomach
· Lift your feet of the floor and lean your upper body backwards to about 45°. Make sure you keep your abdominals pulled in and back straight
· Now move the medicine ball from one side of your body to the other by using your arms. Try to touch the ball on the floor on either side of your body
· Make sure that your upper body stays still and that your abdominals are pulled in throughout this exercise. Try to resist the rotation that you are creating with your arms
· Touch the ball on the floor 8-12 times on each side

7. Lunge hold with resistance band (isometric exercise)

· Tie a resistance band to a door handle (or something else firm) around waist height
· Grab the band with both hands from the side of where you attached the resistance band
· Take a long step forward with the leg closest to the band (end up in a lunge position)
· Straighten your arms with the resistance band in front of you in line with your chest
· Make sure your abdominals are pulled in, that your toes are pointing forward and that your back is tall prior to starting
· Hold this position for 20-40 seconds, then turn over and repeat with the other leg


Always warm up with 5- 10 minutes with easy mobility movements such as body weight squats, leg swings, walking on the spot, walking lunges, cycling etc prior to starting.

Have a go and see how you find the exercises and let me know how you get on!

Good luck!

Monica

Monday, 6 September 2010

Evidence for sports massage??

Is there any evidence to support the use of sports massage is a question I often get asked. The answer to that is simply unfortunately not a lot. So why do so many people still do it?

· Increased lymph flow
· Helps in the removal of waste
· Promotes healing
· Promotes muscle relaxation

They also believe that massage:


According to Mills and Parker Bennett (2004) these are the physiological benefits of massage:

· Increased blood circulation


· Relieves muscle tension
· Mobilises muscle fibres
· Stretches soft tissue
· Improves flexibility

However there are hardly any evidence to suggest why and how sports massage is useful but I have found in my experience that it helps. I learnt during my degree that a good sports therapist should provide treatment from a background of evidence-based practise; however I have learnt that sometimes you need to change this to practise-based evidence. I have seen that sports massage helps people improve their range of movement; I have seen that people feel better after a massage (even though it can be brutal getting a sports massage!). This is why I keep doing it and believe it does make a difference to people. Perhaps in the future sports massage will gain scientific backing, or perhaps it is purely a placebo??


Thanks


Monica

New gym induction video on it's way

For the last year I have been working part time as a gym instructor at Leeds Metropolitan University (Civic Quarter). My main responsibilities are to induct new members of the gym on all the equipment, write individualised programmes for patrons, and help and instruct members of the gym. Over the summer the gym is normally pretty quiet due to all the students going home so I was asked to be in charge of producing a new gym induction film over all the equipment we have in the gym. I thought it would be a good challenge, so I was responsible of contacting the film staff at the University and also get hold of someone who could be my “model”. One of my colleagues stepped up to the mark and offered to help me in my little project, thanks for that Johnny!

After a few meetings with the film crew to discuss how to best organise and film the video, I sat down and wrote down a script over all the 26 pieces of equipment we have in the gym. Having not really done any type of filming like this before, I decided to prepare myself by filming myself while speaking to my laptop, good job no one could hear me when I did that!! We did a test shot of me induction Johnny on the treadmill which you can laugh at underneath:

As English is not my first language a few error were made here and there like hand railings, instead of hands rails. The thing is that when you have to look straight into a film camera and think about the next sentence you have to say, things like that happens. Don’t worry the final film will hopefully be in a language you can all understand.

After getting some constructive feedback on our first attempt, we all got together to start the “real” film. The filming took just over 5 days to complete and believe it or not I think I got used to staring into a camera after a couple of days. Not too sure that weather presenter would be anything for me though.......


Anyway I will be getting the DVD back this week to see if any changes needs to be made, so the film will be ready for all the students to enjoy from the 20th of September. Bet they can’t wait...:)
Follow the link to see the video!

Hard work, rehab and commitment paid off!

As mentioned before I have been working with several sports teams, groups and individuals at Carnegie at Leeds Metropolitan University over the last year. One of the groups I have worked the most with over the last few months is badminton - a nice group of hard working players! I have mainly been working alongside Sarah Milne, a talented 18 year old badminton player who recently competed in the Singapore Youth Olympics.
Less than 3 months before Sarah went to Singapore to compete she had a “small” surgery to her knee. I have been responsible for her rehabilitation and also getting her back to full fitness. I worked closely with her main coach James Vincent and Brendan Chaplin (S and C coach and supervisor), and used what I'd learnt to date to come up with a plan to achieve this goal.
Straight after the surgery Sarah had one week completely off training, to allow healing to start and the swelling go down. The first few weeks after this the training consisted of a lot of gluteus and VMO strengthening in form of glut raises, hip clams, gluteus exercises with resistance band and a lot of single leg squats in front of a mirror to control the knee. Fortunately Sarah was very strong prior to the surgery which meant that only a week after the surgery she was able to continue lifting weights such as dead lifts, squats, SLDL (straight leg deadlift), pull ups etc.
Underneath are some videos of Sarah performing some of the exercises in her programme; squat jumps, a deadlift, pull ups and SLDL (although not straight after the surgery!):


Badminton is an intense sport that demands aerobic and anaerobic endurance, speed and agility, as well as strength. Endurance was another aspect that had to be implemented as part of Sarah’s training. Initially we focused on straight line running on the athletics track, before moving onto more agility and badminton specific movements on court when we felt her knee was sufficiently recovered. Moving onto this type of exercise too soon could put recovery at risk, or worse cause further injury.
Being part of someone’s rehabilitation has taught me the importance of honest feedback about the injury and how the athlete feels. You can have all the training plans in the world and know all the science behind the injury’s stage of healing, but honest feedback from the player is important. This way you are able to change and alternate your training plans if necessary to suit the individual, rather than relying solely on the textbooks or literature!
Sarah came 4th which is a great achievement and Sarah is a living proof that hard work, commitment, effort and talent can lead to great results. Sarah has also been given the title “Player of the Month" September 2010 from Badminton England after her performance in Singapore. Check out an interview with Sarah here:

http://www.badmintonengland.co.uk/text.asp?section=903

It is a pleasure working with such a dedicated young player!
Monica

Sunday, 1 August 2010

Great conditioning session for the MMA fighters

Yesterday was a great conditioning session for the MMA fighters I work alongside together with Brendan Chaplin. They started off with a good warm up consisting of some light stretching before doing some mobility exercises. They then moved on to do a plyometric/power session which I think most of them found tough judging on their facial expressions. This consisted of clap push ups, box jumps, 150 m row, rope climbing and sprints with Brendan pulling them in his “nice” rope.

After the first part was done we went straight to the gym to do some heavy strength work. This consisted of heavy clean pulls, dumbbell presses, squat, curl and press, reverse lunges, chin ups and heavy dead lifts (with Brendan’s new trap bar). The trap bar was new to me, but I like it as it adds variation to the training. The starting position with the trap bar is higher than a normal dead lift from the floor which means it is easier. That didn’t mean it was any easier than usual, because of course they had to add on more weights than they were used to.
Last but not least the conditioning session was completed with a 3 X 5 minutes intense tyreflips, sledgehammering, “tyreslams” and a great 100 metre sprint in combination with some specific 1:1 MMA work. It may look like they are hugging each other on some of the pictures, but I can guarantee you that is far from the truth! A brilliant session with loads of hard work, well done guys! I really enjoy working with such a passionate coach and athletes!

Here are some pictures from the session


Thanks!

Monica