YOU ONLY GET ONE LIFE - MAKE THE MOST OF IT!
Showing posts with label Strength and Conditioning. Show all posts

Monday, 2 January 2012

Accredited UKSCA Strength and Conditioning Coach

I know it has been a while since last blog post, but I have been busy with work and only just got back from my Christmas Holiday in Norway. When I was home in Norway I received a very nice email from the UKSCA (United Kingdom Strength and Conditioning Association) confirming I had passed my Strength and Conditioning Exams which means I am now a fully accredited Strength and Conditioning Coach. A very good Christmas present and start to the new year! 
Although I have always been very interested in training and injuries it was in my last year of University whilst studying for my  Sports and Exercise Therapy degree I got involved with a good S&C coach (Brendan Chaplin) and  actually started getting an insight into what a Strength and Conditioning Coach’s job involves. I have always like coaching and helping others so S&C coaching was something I started enjoying more and more, which is why I decided to start working towards getting a recognised title so I could start combining my skills as a Sports and Exercise Therapist with being a Strength and Conditioning Coach. 
I am currently working as an S&C coach for Bristol Rovers Youth Academy which I really enjoy. I am also currently working for UWIC Athletics Club on an ad hoc basis. 

I wish all my readers a very Happy New Year! Lets make it a good one! 


Wednesday, 19 October 2011

Bulgarian Squat/ Rear Foot Elevated Split Squat - VIDEO

Do you like the burning sensation in your legs and gluteus the day after a tough leg session?

Do you like to struggle to get out of bed in the morning cause your legs ache like mad?

Well if you do, then you should definitely give the Bulgarian Squats a go!

I have added two separate videos showing the exercise underneath, one on each leg. I am using a z-bar with some light weights here, but you can also grab a dumbbell in each hand as well. Having a bar on your back might cue you to keep your chest up thought, which is always a bonus.

This exercise will challenge your balance and you will feel a good stretch in your hipflexors. If you have tight hip flexors, then your range of movement might be restricted, but as you get better at it you will be able to lower yourself down further (Mine is far from perfect, but I am working on it). Make sure your knees face forward throughout the movement.

Excuse me for the facial expressions, but this is my third set so my legs were starting to feel it:)


I always find it harder on one leg, so my left leg is definetely struggling!

Get ready for sore gluteus the following day, good luckJ

Sunday, 16 October 2011

Strength training, running, or both???

How often do you see women pounding miles and miles on the treadmill ?? Beginners as well as experienced gym users will in about 80% of the time attack the treadmill in gyms and fitness clubs. As I have experienced  the effects running and interval training can have on your knees, I can talk about this subject with a great deal of experience.

Why is it that so many people (and women in particular) think it is okay to start running without doing any form for strength training prior or alongside the running??
How long do you think your joints will be able to cope without giving you any pain or discomfort?
If you are lucky and have a good running style, appropriate footwear, perform a good warm up etc. you might be one of the lucky ones and be able to keep running for years without suffering any pain or problems, but in more cases than not this is just a wish….

Have a think about this:
When you are running you put your joints through approximately 8 times more force than when you are walking!! 8 times!!

This is certainly something to think about! I know what I am going to say now will make me sound like I am a 60 year old woman and look back at the “good old days”, but if I knew half of the stuff I know today about training, recovery strategies, progressive overload and strength training I would without a doubt added so much more strength training into my routines alongside all the running I did. This would without a doubt improved all the hours of pain and frustration I have been through as a result of this!

So just a simple advice to all women (and men) out there on this wonderful Sunday:

Strength training is great! Don’t overlook the importance of building up a solid foundation for your body if you enjoy running..... or if you don't like running as well :)
Very concentrated!
I know I have talked about the importance of strength training before and I try to convince women everyday how important strength training is, but if you are not already convinced the popular phrase might convince you :

STRONG IS THE NEW SKINNY! :)

COME ON GILRS, LETS GET STRONG!

Do you agree or disagree?

Friday, 6 May 2011

VIDEO - Front Plank on swiss ball and Front Plank with side steps

Hi everyone,

I know it has been a while since my last update, but today I have been able to post a little demonstration of a good core exercise on the swiss ball and also the normal front plank with some side steps. Those of you who know me know that I think it is really important to add in some good core exercises as part of anyone's program and my view on this still hasn't changed. I have previously described several basic core exercises like the plank in different variations with pictures, but today I will let you have a look at a little film clip so you can see what I mean.

Front Plank on Swissball

  • On this exercise you start in a plank position with your elbows on the ball and feet on the floor
  • Make sure you embrace your core and that you keep like a straight line from top to bottom
  • The small movements I do are done on purpose to challenge the core even more
  • You can always start off by just holding this position and as you want to progress it you can start moving the ball around with your elbows, rememebr to do this controlled though!
  • Start off by moving from 30 – 45 seconds, then rest on the floor for 45-60 seconds between your sets, and repeat 3 sets
Here we go :


Front Plank with Sidesteps

  •  Start with your toes, elbows and forearms on the mat
  •  Your toes should be placed shoulder width apart and your elbows shoulder be placed under your shoulder
  •  Make sure your abdominals are pulled in and that your hips are parallel to the floor throughout the exercise
  • When you are ready start taking a small step with your right toes towards the right side, step back into the middle and step out to the left side with your left toes
  • Make sure you keep your hips stable and don’t let them rock from side to side while moving your legs
  •  Keep moving from 30 – 45 seconds, then rest on the floor for 45 – 60 seconds between your sets, and repeat 3 sets


It may look easy, but give it a try and let me know what you think:)

Good luck :)

Friday, 14 January 2011

Bristol Rovers- Testing Day

I have now started my internship with Bristol Rovers Academy players (9-16 year olds). Before Christmas we had a meeting with the other sports science staff where we decided how to organise a test day for the 15 and 16 year old players. We were lucky to have several  member or staff and interns available to help out which meant that we were able to run all the tests we wanted on one day (within 2.5 hours to be precise). Time is always a big concern in most clubs as you don’t want to take up to much of the players training time, hence why we decided to try and get it all done in one day.

Why do we test players?

Because it helps us identify physical abilities and areas of improvement. It is also a good way of setting goals and targets for players.

Fotball is a complex game with several physiological requirements. The requirents will depend on the player's position, but in general fotballers need to have a combination of aerobic/anaerobic endurance, speed, agility, balance, coordination, strength and power. After you have choosen the tests you want to use, you need to organise the tests in the "right" or most logical order. This means that you always do the non fatigue tests such as anthropmetry (height and weight) first and finish with the most fatiguing tests such as for example the Bleep Test. The main reason  for doing this is to avoid fatigue to optimise each test result.

We did the following tests:

• We started with non fatigue tests first such as height, weight and flexibility tests

• We then did a functional movement screen consisting of overhead squat, back squat, single leg squat, and   80cm hop on one leg that (We filmed all these movements)

• We then did 10 and 30 metre sprints (walk in start with time gates)

• The next was countermovement jumps and squat jumps on a forceplate

• We then did a pro agility test through time gates

• Before we finished off with the lovely Bleep Test (Believe me I have suffered through this test numerous times when playing football and handball and know it can be a killer, so well done boys!)

Considering this was quite a lot to get through with two squads in the time we had available I think it was a really good experience. I have been involved with this kind of testing before, but not with this many players at the same time. It was really interesting and I found it useful as we had to be very structured as we didn't have many seconds to waste. Looking forward to get started with the coaching and get to know the players now.

Have a good weekend everyone!

Sunday, 5 December 2010

THE DEADLIFT- PROPER LIFTING TECHNIQUE

First a little update from the big city of Cardiff. I have now signed up to a gym nearby which means I have attended 4 spinning sessions this week, not bad! Spinning or indoor cycling is something I have always enjoyed as a way to vary my training, I especially think it is a great alternative to keep my fitness up when the roads outside are icy and dangerous! Enough about me and my training, let’s move on to the important topic of the day.

I will be talking about the importance of PROPER lifting technique, not just necessarily lifting technique in the gym, but also principles for people to apply in everyday life when lifting any objects, shopping bags or Christmas shopping off the floor. Most people have hopefully heard at some point to “bend the legs and not lift with the back” when picking things off the floor. But what does this actually mean and how should you perform it?
I thought this was a great opportunity to describe the famous Deadlift that every S&C coach, Sports Therapist or Physiotherapist should know about. The Deadlift is one of the key lifts for several strength/power exercises that start by picking a barbell off the floor, but the Deadlift is also an excellent strength exercise to use as a separate lift. The Deadlift is a compound exercise that works all of the key muscles (prime movers) and several synergist muscles in the abdomen and lower and upper back, as well as the hamstrings, quadriceps and gluteus muscles.

Underneath I have described the way to correctly execute the Deadlift with a barbell; however the key principles are the same when lifting any object of the floor which will be summarised towards the end.

The Deadlift

Starting position (Picture 1 and 2)
Picture 1. Starting position

• Stand with your feet flat and placed between hip and shoulder width apart with the toes pointed outwards slightly

• Squat down and grab the bar with a closed pronated grip (can used a mixed grip as well)

• Place the hands on the bar slightly wider than shoulder width apart, outside the knees with the elbows fully extended

• Position the bar approximately 3cm in front of the shins and over the balls of your feet

• Position the body with:

Picture 2. Starting position

o Back flat

o Trapezius relaxed

o Chest up and out

o Head in line with the spine or slightly hyper extended

o Shoulder over or slightly in front of the bar and eyes focused straight ahead

• All the repetitions begin from this position


Upward movement phase

• Lift the bar off the floor by extending your hips and knees

• Don’t let the hips rise before the shoulders

• Maintain a flat back (this is really important!)

• Keep the elbows extended and the shoulders over or slightly ahead of the bar

Picure 3. End of upward phase

• As the bar raises, keep the bar as close to the shins as possible

• As the bar rises just above the knees, move the hips forward to move the thighs against and the knees under the bar

• Continue to extend the hips and knees until the body reaches a fully erect torso position (Picture 3)

Downward movement phase

• Allow the hips and knees to flex to slowly lower the bar to the floor

• Maintain the flat back position, don’t flex the torso forward (Important!)

Some key pointers to remember:

1. Always keep the object you are lifting close to your body

2. Never round your back, keep your back flat

3. Bend your knees and hips to make sure you can lift with your legs

4. Perform the movement slow and controlled, never rush the movement as you may lose form

One important thing to remember which I think a lot of people get forget is that these principle should not be forgotten if the object you are lifting is “light”! Acute back injuries can be a result of incorrect lifting even if the object you are trying to lift are considered light, so I will encourage people to never underestimate the importance of correct lifting technique. That was my wise words of the day:)

I know it is cold and icy in most places of the UK (and Norway) at the moment, so if you are training outside remember to dress accordingly (hat and gloves is a must).  Enjoy December, it is a great month! If you train consistently between New Year and Christmas, you don’t have to worry about what you eat between Christmas and New Year is my philosophy:)

One last tip of the day: Nicole Scherzinger’s song Poison is a great training song!!

MoTo


Wednesday, 24 November 2010

Women, Strength Training and Sport

I am back in business. I have now moved to a nice little place called Radyr in Cardiff. So far I have tested out a few forest rides around where we live and the views are pretty amazing! I have also purchased a little Ford Fiesta Ghia that I will put up pictures off shortly. Enough about me and my new life, I will move on to the interesting topic of the day: Women and Strength Training

With the increasing number of females competing in sport across the world, there is definitely a need to look at the advantages for female athletes to include strength training as part of their training. I know a lot of women are afraid of getting “bulky” and “manly” if they start training with weights, but another thing is to understand what advantages strength training can provide on the track, field or wherever you are competing. Just so people know I am today talking about specific strength training for sports like football, basketball, badminton, tennis, athletics etc, NOT power lifting or body building just so we don’t confuse this. So the chances of looking like the "woman" underneath is pretty slim....
This picture is from http://www.triplem.com/
Before I start talking about strength training I want to reassure women:

It takes a lot and I mean a lot of hard, consistent training for women to get BIG!
From a sports point of view you would never want to train to get big anyway. As an athlete whether you are a footballer or tennis player you need to be able to move quickly, change direction and produce a certain amount of power every time you hit the ball! What I am trying to say is that as long as you train specific to the sport you are playing, which is most likely not going to involve a lot of hypertrophy training all year around (except in the off season and possibly preseason depending on the sport) this will not make you bigger. So please look below for the main big advantage of including strength training in your programs and see if I can convince you!

INJURY PREVENTION (What a surprise I would say that!)

Knee injuries are a subject that is very much related to female athletes. According to a National Collegiate Athletic Association report, female basketball players were six times more likely to incur an ACL tear than male players!! (1, 2 & 3). There could be several reasons why this number is so high, one factor could solely be that so many more females compete in organised sport compared to before like I mentioned above. Other people have suggested more causative factors such as joint laxity, limb alignment, ligament size, hormonal changes etc could affect the observed differences in knee injuries between men and women (1 & 3). No matter what the reason is for all the knee injuries, it is important that we try to strengthen ligaments and enhance neuromuscular control of the knee joint prior to and during sport participation. We can't change the way we are born in terms of ligament size, our joint angles etc, but we can certainly do something about the muscles that keep it all together.

It is a fact that most ACL injuries occurs from non-contact mechanisms such as deceleration, landing, change of direction, lateral pivoting etc. For this reason it is important to take part in a conditioning program that is designed to strengthen the supporting structures around the knee and also increase the neuromuscular control of the knee which may reduce the risk of sports related injures (4 & 5). I think a combination of strength training, balance and proprioception can make a massive difference to this.

For young female athletes in particular it is really important to perform some type of resistance training regularly to increase their resistance to injuries and approach their genetic power and strength during adulthood. So for younger athletes it is important to start preparing their bodies for the demands the sport they are playing will place on them. If I could change one thing about the way I trained when I was younger (not that I am THAT old now!) that would definitely be to train more strength and balance, rather than doing the million running sessions like I used to do. Don’t get me wrong, it was good being able to run solid for 90 minutes, but it would definitely have been an advantage to be stronger than I was when I played. But you learn through experience and hopefully I will be able to help and develop other athletes to improve their performance and reduce their chances of injuries, let’s hope so:)

What’s your view on strength training and women?

MoTo

References:

1. Arendt, E & R. Dick (1995). Knee Injury Patterns among men and women in collegiate basketball and soccer: NCAA data and review of literature. Am J Sports Med 23:694-701.

2. De Loes, M., L. Dahlstedt & R. Thomee (2000) A 7-year study on risks and costs of knee injuries in male an female youth participants in 12 sports. Scand J Med Sci Sports 10:90-97.

3. Hewett, T (2000) Neuromuscular and hormonal factors associated with knee injuries in female athletes. J Knee Surg 18:82-88.

4. Emery, C (2005) Injury prevention and future research. Med Sci Sports Exerc 48:179-200.

5. Hewett, T., G. Myer & K. Ford (2005) Reducing knee and anterior cruciate ligaments injuries among female athletes. J Knee Surg 18:82-88.

Friday, 12 November 2010

The Back Squat- How do you perform it and is it a good exercise?

I have really started enjoying the blogging lately and I find that the best place to pick up inspiration is when I am in the gym training. Today this wasn’t the case as I actually got my inspiration to write about the Back Squat when I woke up this morning. My gluteus muscles were so sore after the squats I did yesterday that I could barely get out of bed, but it is a great feeling knowing you have worked hard!! So today I will talk a little bit about the Back Squat.
The Back Squat is a very common exercise in the world of Strength and Conditioning, in fitness centres and pretty much everywhere people do some form of strength training. It is an exercise that every S&C coach should have in their exercise “library”. The Back Squat works the key muscles groups in your legs as well as your core muscles. In almost every sport where you move your own body weight around is it important to have strong legs.These are the muscles that you work in a Back Squat if you do the exercise correct:

• Quadriceps, Gluteus Maximus and Medius, Hamstrings, Erector Spinae, Latissimus Dorsi, Abdominals and the Adductors

As with every exercise it is important to perform the exercise correctly and the Back Squat is definitely no exception. I will therefore describe how to perform the Back Squat (from a Squat Rack):

Equipment needed: Barbell, Squat Racks, Weight Discs and enough floor space

Starting position

• Grab the bar with a closed pronated grip (overhand)

• Step under the bar and position your feet parallel to each other

• Place the bar in a balance position on the upper back and shoulder in one of the two locations:

o Low bar position: across posterior deltoids at the middle of the trapezius (using a handgrip wider than shoulder width)

o High bar position: above the posterior deltoids at the base of the neck (using a handgrip only slightly wider than shoulder width)

• Hold your chest up and out and tilt the head slightly up

• When you are ready to lift the bar off the rack, extend your hips and knees to lift the bar off

• Take one or two steps backwards, position your feet shoulder width apart (or wider), with the toes pointed slightly outwards (Picture 1 and 2)
 
Picture 1- Starting position from the side


Picure 2- Starting position from the front
Downwards phase

• Maintain a position with the back flat and chest up and out

• Allow your hips and knees to slowly bend while keeping the torso-to-floor angle relatively constant

• Keep the heels on the floor and the knees in alignment over the feet

• Avoid rounding your back or lean your upper body forward

• Keep bending your hips and knee until your thighs are parallel to the floor, the trunk begins to round or bend forwards or your heels lift off the floor (Picture 3)
  
Picture 3 Bottom position


Picture 4- Bottom position
Upwards phase

• Maintain your back flat, elbows high and chest up and out


• Extend your hips and knees, whilst keeping your heel son the floor and your knees in alignment over your feet

• Avoid bending forward or round your back

• Continue extending until you reach the starting position, don’t lock your knees fully

• At the end of the set, step forward towards the rack

• Squat down until the bar rests in the rack

It is great if you can look at yourself in the mirror when performing a Back Squat as you can keep an eye of your own technique, at least from the front. I am not going to describe the most common mistakes people do when squatting in this post, but one thing you can look at if you have a mirror is whether your knees are moving inwards or the distance between your knees stays the same throughout the movement. Knees moving inwards is particular common in women and there can be several reasons why this happens, but sometimes it is possible to correct it by just focusing on it (if you are aware it is happening).

There are a lot of discussions on how deep you should go in the back squat. I personally think that you should aim to get your femur parallel to the floor (like described above). The reason for this is because the gluteus maximus (the big hip extension muscle) becomes more active when you get full range of movement (Picture 5) This is not only positive from an athlete’s point of view, but also for people wanting to get a strong and powerful bottom! From an injury prevention point of view the back squat is a very important strength exercise for the quadriceps muscles, which is important in relation to knee injuries and knee pain so it is definitely a good exercise in my eyes.

Picture 5- Gluteus Maximus
 I know a lot of girls are scared of getting “bulky”, “big” and “massive” which I think is a bit sad (I will come back to this on another blog post) but surely everyone wants to have a nice, strong bum??!

So people, let’s get our bottoms strong, explosive and powerful!

Have you ever tried the Back Squat? Do you like it?

MoTo

Monday, 1 November 2010

Bristol Rovers Internship

I recently applied for an internship with Bristol Rovers Football Club as S&C coach for their 9-16 year olds players. I was selected to have a phone interview last Friday which I thought was a bit of a challenge. I got asked questions from two experienced men and it wasn't just easy to think and try to give good answers under pressure. So after the interview on Friday I was a bit disappointed as I didn't think I gave a very good impression over the phone.I thought to myself  that I wouldn't hear anything back from them and was a bit annoyed with myself for not being able to give better answers...

However I guess my instict was wrong as I suddenly got a nice phonecall from Lee Southernwood (Fitness Coach for Bristol Rovers) who offered me the position and said he was really impressed with my interview. Great news! Maybe it is true that girls are a bit too critical sometimes:) They have also given the position to another guy, which means we will work as a team to try and develop their 9-16 year olds players. I think it is a great opportunity as I have always been really interested and passionate about football, and I am hoping to be able to transfer some of the knowledge and experience I have with football to the younger players.

This is a great picture from one of our yearly training camps to Spain with the team I used to play for in Norway (Klepp). We used to have a lot of fun between sessions!! Lets hope I will be able to spread some positive attributes to the young players at Bristol Rovers:)

MoTo:)

Thursday, 28 October 2010

INTERVAL TRAINING: A great way to get fit without long lasting treadmill sessions!

Today I wanted to give you my opinion on one of the most effective ways of getting fit without spending hours and hours in the gym pounding the treadmill. The method I will explain is nothing new or anything extraordinary it is just an effective way of getting your heart rate up, burn a good amount of calories without having to spend half of your day training. The protocol is called Tabata and was originally invented by Dr. Izumi Tabata from Japan in 1996. The actual workout consists of the following:

• 20 seconds hard work followed by 10 seconds rest/recovery X 8 times = 4 minutes

I would recommend doing this sequence 4 times with 1 minutes rest between. In total that is 19 minutes. You can of course perform these intervals on the standard bike, treadmill, rower, cross trainer or whatever you prefer in the gym, but I will list up some more exciting variations:


Picture 1- Push up (Starting position)
• Burpes

• Pushups (Picture 1)

• Spidermans

• Frogjumps

• Mountain climbers (hold on a bench)

• Explosive squats
Picture 2- Medicine ball slams

• Dumbbell swings (kettlebells)

• Medicine ball slams (Picture 2)

• “Hopping” walking lunges

• High knees

• Star jumps etc etc etc.


 Basically any movement that gets your heart rate going can be used. You can for example do burpes for the first 4 minutes, then change it to explosive squats for 4 minutes, then do pushups for the next 4 minutes before finishing with 4 minutes of medicine ball slams. You can choose the exercises so they are specific to the sport or you can choose them depending on what you want on the day, your imagination is the only limit. For example when I coached some MMA fighters earlier this year (with Brendan Chaplin) they did tyre flips, tyre slams and clinching as part of their intervals. Don’t forget to do a good warm up for at least 10 minutes before you start to get your heart rate and blood flow going.

I really think people should move away from spending long lasting boring sessions in the gym, when you get so much more out of working harder for shorter periods. I will be honest and say that a few years ago I believed that in order to get fit and lose weight you had to train with low intensity for a long time in order to increase your fitness. I have thankfully become a little bit wiser (maybe not much) since starting University and realised that the harder you work the fitter you get and the more energy you burn, not rocket since, is it? At the same time it is a fact that the body relies on carbohydrates as the main source of energy if the intensity is moderate/high, but as a result of getting fitter our body becomes more effective at utilising fat as energy source. This should be a big motivation to train a bit harder for people who want to lose weight as well as getting fit!

I am aware that this may sound like I don’t think low intensity sessions are important, because I certainly think it has got its place for example as recovery sessions or in easier periods of training. Anyway I will let you get on with your training now, and I can assure you that I have tried the Tabatas intervals and they definitely got my heart pumping! Give it a go and try it yourself:)

What types of interval training do you like the most?

Cheers,

MoTo

Friday, 1 October 2010

General Back Exercises

Lower back complaint is a problem most people will experience at some point in their life. Some people suffer serious back pathologies like disk herniations and prolapses, although furtunately far more back complaints are due to muscle strains, tightness and muscle related pain. Anyone who has had back pain knows it inhibits you in your everyday life and can be very uncomfortable. A lot of the back problems can be reduced by making sure you have a strong back (and core-see a previous post on core training) which is why I will describe some very basic and simple back exercises that everyone can do in their own home, without needing much equipment. Before you start you should read the general guidelines. Good luck J

General guidelines

Type: Lower back exercises to strengthen the lower back
Purpose: To improve lower back strength

Suitable for: Everyone who wants to strengthen their lower back with some basic exercises

Equipment needed: Foam roller and exercise mat

Repetitions and sets:

3 sets per exercise

10 - 15 repetitions per exercise

90 – 120 seconds recovery between sets

The workout
1. Foam rolling - Lower back


• Start by laying on your back on the floor

• Place the foam roller under your lower back

• Place your hands behind your back to hold yourself off the floor (Picture 1)

• Now roll your back on the foam roller, from above your hip bones to mid part of your back (Picture 2)

• If you find a tender spot, apply a bit more pressure and roll back and forwards over the tight spot

• To increase the pressure further, lean over slightly to one side of your back and roll up and down

• Roll for 45 - 60 seconds on each side

2. The “swimming stroke”
  

• Start by laying on your front on the exercise mat

• Place your hands on either side of head, in line with your ears

• Lift your hands and upper body approximately 20 – 30 cm off the floor

• Keep your palms facing down and elbows to 90°

• Pull your arms back by squeezing your shoulder blades together  (Picture 1)

• Then straighten your arms in front of your head so your hands touches in front of you (Picture 2)

• Make sure your feet stays flat on the floor, and look down to relax your neck throughout the exercise

• Do 10-15 repetitions


3. Arm and leg extension on all fours
• Start on the exercise mat on all fours with your arms in line with your shoulders

• Pull your abdominals up towards the ceiling prior to starting this exercise

• Straighten opposite arm and leg

o Arm should be lifted just above shoulder height (straighten your arms forwards rather than up)

o Leg should be lifted till it is in line with your bottom

o Bend your arm and leg down at the same time, till you can touch your hand onto your knee and repeat

• Focus on keeping your abdominals tucked in and avoid rocking from side to side during this exercise

• Do 10-15 repetitions on opposite leg and arm and then change

4. Glut bridges


• Start by lying onto your back on the exercise mat (or on the floor) (Picture 1)

• Bend your knees by placing your heels in line with your knees (half a foot away from your bottom)

• Rest your arm by the side of your body

• Lift your hips up by squeezing your bottom till your back is straight (Picture 2)

• Hold this position for 3-5 seconds and lower your hips back down to the floor and repeat

5. Leg and arm raises

• Start by lying on your front on the exercise mat

• Place your arms straight above your head and legs hip width apart

• Lift opposite hand and leg about 30-40 cm off the floor at the same time
My leg is lifted too high off the floor on this picuture, so don't lift as high as I do here:)

• Try to reach forwards with your hands rather than lifting too high

• Keep facing down to relax your neck

• Do 10-15 repetitions on opposite leg and arm and then change

6. Core activation

• Start by lying on your back on the exercise mat

• Place your hands under each side of your lower back

• Pull your belly button down towards the floor and push your lower back down so your hands gets a firm squeeze

• Hold this position for 5-8 seconds, relax and repeat 15 repetitions

NB! Please be aware that isometric exercises can lead to an increase in blood pressure and may therefore not be suitable for people with hypotension

7. Front plank (isometric exercise)

• Start with your toes and elbows/forearms on the mat (Picture 1)

• Your toes should be placed shoulder width apart and your elbows shoulder be placed shoulder width apart in line with the top of your shoulders

• Make sure your abdominals are pulled and that hips are parallel to the floor throughout the exercise

• There is no movement during this exercise

• Hold the starting position between 20-40 seconds (without letting your hips drops or raise up)

• Relax between 120-180 seconds between your sets and repeat 3 times

---------------------------------------------------------------------------------------------------
Always warm up with 5 minutes of easy mobility movements such as side bends, upper back rotations, arms swings etc.
Always cool down after the workout with 5-10 minutes of stretching for the main muscles used in the work out. In particular your lower back and the side of your back. Hold each stretch for 20-30 seconds and do 2-3 sets of each stretch

Cheers

MoTo :)

Saturday, 25 September 2010

WARM UP - Specific to what you are going to do!

Warm up is a theme coaches and trainers have debated and discussed for years. RAMP is a common acronym when discussing warm up, and the letters stands for - Raise, Activate, Mobilise and Potentiate. In simple terms the warm up is there to prepare your body for what you are going to do next! If you are playing football, basketball, rugby etc this will involve a lot of running and a lot of change of direction, so to raise the body temperature, heart rate and mobilise the joints is crucial. Some coaches still use the old line: "Run around the pitch twice". However is running around a pitch twice ticking all the boxes that a warm up should include? I don't think so. How about including some functional mobility exercises as part of the warm up to make sure your joints have been taken through range of movements they are likely to be working through in training/match?

I think that mobility exercises as part of anyone's warm up is underrated. I will therefore describe some simple mobility exercises that athletes can include as part of their warm up whether this is for a team sport or before lifting weights in the gym.

Type: Mobility warm up exercises to prepare the body for exercise
Purpose: To improve blood flow to the working muscles and increase mobility of the joints
Suitable for: Tennis players, team sports and individuals
Equipment needed: Mini resistance band
Repetitions and sets:
1-2 sets per exercise
10 - 15 repetitions per exercise

1. Hamstring walkouts

Start by standing with your feet at hip width apart
Lean your upper body forward without bending your knees and touch the floor (if you have tight hamstring you can bend them slightly) (Picture 1)From this position walk yourself forward by using your hands until you get to a press up position (Picture 2)
From this position walk your hands back till your hands touch your feet and repeat
Your feet stays still throughout the exercise
Keep your hips still and avoid rocking too much from side to side
Perform this movement 10-15 repetitions

2. Lunge with twist
Start by standing with your feet about hip width apart on the floor
Pull your abdominals in and keep your chest out prior to starting
Let your hands rest comfortably on the side of your body
Step forward in a lunge position by bending both knees is in line with your ankle
Your front knee should not cross the line of your toes and your back knee should just touch the floor gently
With the hand on the same side as your front leg touch the inside of your front leg(Picture 1)
The other hand opens up outwards and make a half circle
Push your front leg back up and step back to the starting position, repeat with the other leg
Remember to always touch the front foot with the hand on the same side as the front leg
Repeat 8-12 steps on each leg

3. Squat, touch toes, hands up and stand up
Start by standing with your feet about hip width apart
Front this position lean forward and touch the inside of your big toes without bending your knees (if you have tight hamstring muscles you can bend them slightly) (Picture 1)
While holding onto the inside of your foot, squat down by bending your knees till your bottom is in line with your knees (Picture 2)When you get into this position, lift one hand up above your hand (Picture 3) and then the other hand (Picture 4)You can then straighten your knees, stand up into the starting position and repeat(Picture 5)
Make sure you keep the weight onto your heels throughout this exercise
Repeat 10-15 times

4. Side lunges
Start by standing with your feet about hip width apart on the floor
Pull your abdominals in and keep your chest out prior to starting
Lift your arms in front of your body till about chest height
Step out till the side with your right leg by bending your right knee.
Keeping your arms in front of your body to counterbalance and make sure your knees are pointing forwards
Stick your bottom back and keep your chest out while getting into the position (Picture 1)
From this position, drive your right leg back by pushing it off the floor into the starting position and repeat
You can alternate from side to side or do all your repetitions on one leg before changing to the other
Do 8 – 12 repetitions on each leg


5. Press up position to rotation

Start on the floor in a press up position with your elbows in line with your shoulders
Keep your abdominals pulled in prior to starting this movement
From this position, lift your left hand off the floor and make a half circle by rotating to the left (Picture 1)You left hand should be in line with your body when looking from the side
Rotate your body back down to the starting position and repeat on the other side
Do 8-12 repetitions on each side

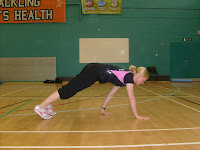
6. Spiderman

Start on the floor in a press up position with your elbows in line with your shoulders(Picture 1) Keep your abdominals pulled in prior to starting this movement
Bend your right knee and take a step forward with your right leg, place your right foot next to your right hand
To increase the stretch behind your lright leg you can touch the left elbow down onto your left foot (this is optional)
Lift your left leg back to the starting position and repeat on the other side
Do this 10 – 15 repetitions on each leg

7. Glut bridges

Start by lying onto your back on the floor
Bend your knees by placing your heels in line with your knees (half a foot away from your bottom)
Rest your arm by the side of your body (Picture 1)Lift your hips up by squeezing your bottom till your back is straight (Picture 2)Hold this top position for 5 seconds and lower your hips back down to the floor and repeat
Do this 10 -15 repetitions
8. Windmill
Start by standing with your feet about 1 metre apart
Bend your upper body forward by slightly bending your knees
Touch your right hand on the outside of your left foot (Picture 1)Change over and touch the left hand on the outside of the right foot and repeat for 10—15 repetitions
Keep your chest out throughout this exercise


9. Hip flexion with mini resistance band

Start by laying on your back with the resistance band around the top of your feet (point your toes upwards to make sure the band doesn’t come off) (Picture 1)Bend right hip by bringing your right knee towards yourself till your hip is at approximately 90° (Picture 2)Keep the right leg straight while moving the left leg
Bring the left leg back down by straightening your hip and knee and repeat with the right leg Repeat this 10-15 times on each leg
10. Shuffles with mini resistance band (forwards, sideways and backwards)

Start by placing a mini resistance band around both knees together
Stand with your feet hip width apart, with a small bend in your knees prior to starting
Take a step forward with left leg, then move the right leg close to the left leg (Picture 1)Now move the right leg forward before moving the left leg close to the right leg etc.
To move the front leg you have to abduct (bring the leg out) the leg against the resistance band, which means you should face sideways slightly before starting
Always remember to bend your knees and keep your chest out when doing these movements
You can also walk sideways (Picture 2) and backwards with the band (Picture 3), by changing the starting position
If you alternate between the 3 different movements you can perform this for approximately 5 minutes
Thanks
Monica