YOU ONLY GET ONE LIFE - MAKE THE MOST OF IT!

Thursday, 14 October 2010

Recovery and Flexibility Program

Today I decided to describe a recovery session consisting of foam rolling and key stretches. This session can be useful the day after a hard day of training or competition or just as part of your weekly program if flexibility is an issue of concern. However this session could also be included towards the end of ligther sessions.  If you choose to do it as a separate session or after a session is up to you, but either way it is important to be warmed up to allow for the increase in body temperature needed for effective stretching. This can consist of 5-10 minutes of for example easy jogging, cycling, rowing etc and mobility movements such as walking lunges, body weight squats, side lunges, spiderman’s etc – see previous blog for a sample of mobility exercises.

Type: Recovery and flexibility program

Purpose: Improve muscle flexibility and aid recovery between sessions or after light sessions

Suitable for: Everyone

Equipment needed: Foam roller and a mat (or just use the floor)

Repetitions and sets:

Foam rolling: 45 - 60 seconds per muscle group

Stretches: 30 - 45 seconds hold (to a point of mild tension) for 2-3 sets per muscle group

---------------------------------------------------------------------------------------------------
Picture 1
1. Foam rolling - Calves

• Start by placing your calves on top of the foam roller, start just above your Achilles tendon (Picture 1)

• Place your hands behind your back to hold yourself off the floor

• Now roll your calves on the foam roller, from above your Achilles tendon to the back of your knee (Picture 2)

• If you find a tender spot, apply a bit more pressure and roll back and forwards over the tight spot

Picture 2

• To increase the pressure further, cross one leg on top of the other, only place one calf on the foam roller

• Roll for 45- 60 seconds on each calf


2. Foam rolling - hamstrings (back of thighs)
Picture 1

• Place your hamstrings on top of the foam roller, start just above your knee (Picture 1)

• Place your hands behind your back to hold yourself off the floor

• Now roll your hamstrings on the foam roller, from above your knees to the bottom of your gluteus (Picture 2)
Picture 2
 • If you find a tender spot, apply a bit more pressure and roll back and forwards over the tight spot


• To increase the pressure further, cross one leg on top of the other, only place one hamstring on the foam roller at the time

• Roll for 45 – 60 seconds on each leg


3. Foam rolling - lower back

Picture 1
• Place the foam roller under your lower back (Picture 1)

• Place your hands behind your back to hold yourself off the floor

•  Roll your back on the foam roller, from above your hip bones to upper part of your back (Picture 2)

• If you find a tender spot, apply a bit more pressure and roll back and forwards over the tight spot. Rest your arms onto your belly while rolli

Picture 2
• To increase the pressure further, lean over slightly to one side of your back at the time

• Roll for 45 - 60 seconds in the middle, and 45- 60 seconds on each side


4. Foam rolling – thoracic spine (Sorry, no picture for this one)


• Place the foam roller between your shoulder blades

• Place your hands behind your neck and squeeze your elbows together in front of you to make it easier to target the muscles between your shoulder blades

• Now roll your upper back on the foam roller, from the lowest part of your shoulder blades to your neck

• If you find a tender spot, apply a bit more pressure and roll back and forwards over the tight spot

• Roll for 45 – 60 seconds


Picture 1 (I guess I am closing my eyes cause I am concentrating very hard)
 5. Foam rolling- Latissimus Dorsi (each side of your back)

• Place the foam roller under yourself on the side, in line with the lowest part of your shoulder blade

• Straighten your lowest arms above your head, let your feet rest on top of each other or just how you feel most comfortable

• Roll on the foam roller from your side from the lowest part of your shoulder blade till your armpit
(Picture 1)

• When you are done with one side turn over onto the other side and repeat

• Roll for 45 – 60 seconds on each side


Picture 1
6. Foam rolling - Quadriceps (front of thighs)

• Start by laying on your front on the floor

• Place the foam roller under your thighs, start just above your knees (Picture 1)

• Place your hands in front of you to hold yourself off the floor

Picture 2
• Now roll the front of your thighs on the foam roller, start above your knees to the top of your hips (Picture 2)

• If you find a tender spot, apply a bit more pressure and roll back and forwards over the tight spot

• To increase the pressure further, cross one leg on top of the other, only place one thigh on the foam roller at the time

• Roll for 45 - 60 seconds on each thigh


Picture 1
7. Foam rolling- Iliotibial Band (outside of thighs)

• Start by laying on the side on the floor

• Place the foam roller under the bottom leg just above the knee (Picture 1
Picture 2
• Keep the bottom leg straight, but bend the top leg and cross over the bottom leg

• Place your arms in front of you wherever to find it most comfortable

• Roll from the top of your knee till the top of your hip (Picture 2)

• When you are done with one leg turn over onto the other leg and repeat

• Roll for 45 – 60 seconds on each leg

You may find this one quite sore as I know a lot of peole find this one  ucomfortable, but I think you can do it :)


Picture 1
8. Calf stretch

• Start with your hands and feet on the floor

• Cross one leg behind the other, make sure the bottom heel can’t touch the floor (Picture 1)

• From this position step forward a bit further with both feet until you can feel a stretch in your calf in the bottom leg

• You should push the heel on the bottom leg down to increase the stretch further

• When you are done with one leg, cross the other leg over and repeat


Picture 1
9. Hamstring stretch

• Start by laying on your back on the floor

• Lift one leg up in the air and grab your hands behind the back of the knee (Picture 1)

• From this position, try to straighten your knee first, then pull your leg towards you whilst keeping the knee straight

• Relax your head and everything else when you do this

• For some people it will be enough to straighten the knee up, others will be able to straighten the knee and pull the knee closer. This is individual, don’t overstretch!

• When you are done with one leg, lower the leg down and repeat with the other leg


Picture 1
 10. Gluteus stretch

• Start by laying on your back on the floor

• Bend both knees, cross right leg on top of the left leg (the left foot should rest on top of the right knee) (Picture 1)

• Grab your left leg behind your thigh with both hands and pull it towards you until you can feel a stretch on the outside of your right bottom

• When you are done with one leg, cross the other leg over and repeat


Picture 1
11. Quadriceps stretch

• Start by laying on your side on the floor with the bottom hand supporting yourself

• Bend the top leg and grab hold of the ankle with the top hand

• Push your ankle towards your bottom, push your hip forwards and make sure your knees are close together   (Picture 1)

• When you are done with one leg, turn over onto the other side and repeat


Picture 1

12. Lower back stretch (“cat stretch”)

 • Start by sitting on top of your heels on the floor

• From this position, lean you body forwards and reach your hands forward as far as you can (Picture 1)

• Make sure your bottom stays in contact with the heels all the way through the stretch

Picture 2
• You can change the position of your hands to each side to feel the stretch more on the side of your lower back (Picture 2)


I hope you enjoyed this "nice" and relaxing program. I know this session may not be the most exciting in terms of tempo,pace and energy, but sometimes we need to relax and recover to make sure we get the training effects we want. I will say recovery is just as important as the rest of your strength, power, speed, endurance and agaility training, however recovery is so must more than stretching and foamrolling so we have to look at that another day...

How do you find foamrolling? Do you think it is a useful tool?

Thanks

MoTo

Sunday, 10 October 2010

Shoulder Pre/Rehab Exercises

Shoulder pain and injuries are a common complaint in several sports such as tennis, rugby, volleyball, netball etc. Shoulder pain can either be caused by an acute injury or build up over time as an overuse injury. The general population can also experience shoulder problems often caused by muscular imbalances or overuse. If the pain is caused my muscular imbalances this can often be improved by simple rotator cuff exercises (See underneath).
The shoulder joint is a ball and socket joint which means it allows a lot of movement. In order to protect the shoulder from moving too much and keep the arm (humerus) into the socket (glenoid fossa), the shoulder consist of the rotator cuff muscles (supraspinatus, infraspinatus, teres minor and subscapularis) which are there to provide stability of the shoulder. The exercises I will explain target these muscles as well as other important muscles in close relation to the shoulder. You should read the guidelines underneath and please be aware that you should not perform these exercises if you experience any pain whilst doing them.

Type: Strength exercises to improve shoulder mobility and strength

Purpose: To mobilise the shoulders and strengthen the muscles around the shoulder

Suitable for: All sportsmen and women participating in overhead sports as well as the general public

Equipment needed: Resistance band

Repetitions and sets:

3 sets per exercise

10- 15 repetitions per exercise

120-180 seconds recovery between sets

The workout

Picture 1
Picture 2
1. TWY with resistance band

• Attach a resistance band onto something firm on the wall about chest height (door handle etc)

• Grab the band in each hand with your palms facing forwards and your thumbs pointing up

• Stand with your feet hip width apart facing the wall, back straight and chest out

Picture 3
• T- Pull the band with straight arms and open up your chest, this should be around shoulder height (looks like a T when looking from behind - Picture 1)

• W- Pull the band by bending your elbows and open up till your elbows are at 90° (looks like a W when looking from behind - Picture 2)

• Y- With straight arms pull the band above your head (looks like a Y when looking from behind -Picture 3)

• Focus on keeping your back straight, all the movement should be done with your shoulders and arms

• Repeat this 8-10 times on each letter


2. Scapular push ups

Picture 1
• Start in a press up position with hands shoulder width apart on the floor (Picture 1)

• Start with arms straight and make sure abdominals are pulled in prior to starting

• You can choose to do this exercises on your toes or on your knees

• Lower yourself down by pulling your shoulder blades together at the back (Picture 2)

Picture 2
 • Push yourself back up to the starting position

• Keep the arms straight all the way through the movement

• There is not a lot of movement when you do this exercise correctly, but the focus is on retracting your shoulder blades together. As you can see there is not a lot of movement on this exercise.

• Repeat 10 – 15 times


Picture 1
3. External rotation with resistance band

• Stand with your feet shoulder width apart next to a wall (the hand you are using should be furthest away from the wall)

• Grab one end of the resistance band with your right hand

• Bend your elbow to 90° and place it next to your ribs (Picture 1)

• Before you start make sure there is some tension in the band when you hold your elbows to 90°


Picture 2
 • Pull the resistance outwards whilst still keeping your elbow close to your body (Picture 2)

• Internally rotate your shoulder and elbow to come back to the starting position and repeat
• Repeat 10 – 15 times on each arm


4. Internal rotation with resistance band


Picture 1

Picture 2


• Attach a resistance band onto something firm on the wall about elbow height (door handle etc)

• Grab hold of the resistance band with the arm closest to the wall (Picture 1)

• Now pull the band towards your belly button whilst keeping yout elbow close to the side (Picture 2)

• If this is easy, increase the distance from the wall to increase the tension of the band

• Repeat 10 – 15 times on each side


Picture 1
 5. Subscapularis pull with resistance band


• Attach a resistance band onto something firm on the wall about shoulder height (door handle etc)

• Stand sideways 1.5-2 metres away from the wall with the closest arm to the wall holding the band with an overhand grip

• Start off with your arm straight out from the side (Picture 1)
Picture 2
• Make sure your abdominals are pulled in and that your back is nice and tall prior to starting this exercise

• Start the exercise by pulling the band behind your back by flexing your elbow until you reach  about 90° behind your back (Picture 2)

• Extend your elbow back to the starting position

• Repeat 10 – 15 times on each side


6. Scapular wall slides
Picture 1

• Position yourself approximately 30 centimetres away from a wall, facing away from the wall

• Feet should be shoulder width apart

•Place your elbows onto the wall , make sure your hands and forearms are in contact with the wall (Picture 1)

• Slowly move your arms up the wall (let your hands meet above your head if possible - (Picture 2) then lower your arms just below the starting position
• Try to squeeze your shoulder blades together at the bottom position


Picture 2
• It is important to keep your elbow and forearms in contact with the wall throughout the whole execution of the movement

• Also focus on keeping your shoulders depressed throughout the movement

• Repeat 10 – 15 times


7. Supraspinatus abduction with resistance band (Sorry didn't have a picture of this one)

• Place one foot on top of one end of the resistance band

• Grab the band with opposite hand with an overhand grip

• Feet should be hip width apart and abdominals pulled in prior to starting the exercise

• Keep your arm straight while abduction your arm out till the side, stop when you reach 90° (in line with your shoulder)

• Lower your arm back to the starting position

• If this is easy, create more tension on the band prior to starting the exercise

• Repeat this 10 – 15 times on each arm

---------------------------------------------------------------------------------------------------

Always warm up with 5 minutes of easy shoulder mobility movements such as backwards and forwards arms swings, shoulder rotations, alternate forwards and backwards arm swings etc.
Always cool down after the workout with 5-10 minutes of stretching for the main muscles used in the work out. Hold each stretch for 20-30 seconds and do 2-3 sets of each stretch.

Hope this was useful. Thanks

MoTo

Friday, 1 October 2010

General Back Exercises

Lower back complaint is a problem most people will experience at some point in their life. Some people suffer serious back pathologies like disk herniations and prolapses, although furtunately far more back complaints are due to muscle strains, tightness and muscle related pain. Anyone who has had back pain knows it inhibits you in your everyday life and can be very uncomfortable. A lot of the back problems can be reduced by making sure you have a strong back (and core-see a previous post on core training) which is why I will describe some very basic and simple back exercises that everyone can do in their own home, without needing much equipment. Before you start you should read the general guidelines. Good luck J

General guidelines

Type: Lower back exercises to strengthen the lower back
Purpose: To improve lower back strength

Suitable for: Everyone who wants to strengthen their lower back with some basic exercises

Equipment needed: Foam roller and exercise mat

Repetitions and sets:

3 sets per exercise

10 - 15 repetitions per exercise

90 – 120 seconds recovery between sets

The workout
1. Foam rolling - Lower back


• Start by laying on your back on the floor

• Place the foam roller under your lower back

• Place your hands behind your back to hold yourself off the floor (Picture 1)

• Now roll your back on the foam roller, from above your hip bones to mid part of your back (Picture 2)

• If you find a tender spot, apply a bit more pressure and roll back and forwards over the tight spot

• To increase the pressure further, lean over slightly to one side of your back and roll up and down

• Roll for 45 - 60 seconds on each side

2. The “swimming stroke”
  

• Start by laying on your front on the exercise mat

• Place your hands on either side of head, in line with your ears

• Lift your hands and upper body approximately 20 – 30 cm off the floor

• Keep your palms facing down and elbows to 90°

• Pull your arms back by squeezing your shoulder blades together  (Picture 1)

• Then straighten your arms in front of your head so your hands touches in front of you (Picture 2)

• Make sure your feet stays flat on the floor, and look down to relax your neck throughout the exercise

• Do 10-15 repetitions


3. Arm and leg extension on all fours
• Start on the exercise mat on all fours with your arms in line with your shoulders

• Pull your abdominals up towards the ceiling prior to starting this exercise

• Straighten opposite arm and leg

o Arm should be lifted just above shoulder height (straighten your arms forwards rather than up)

o Leg should be lifted till it is in line with your bottom

o Bend your arm and leg down at the same time, till you can touch your hand onto your knee and repeat

• Focus on keeping your abdominals tucked in and avoid rocking from side to side during this exercise

• Do 10-15 repetitions on opposite leg and arm and then change

4. Glut bridges


• Start by lying onto your back on the exercise mat (or on the floor) (Picture 1)

• Bend your knees by placing your heels in line with your knees (half a foot away from your bottom)

• Rest your arm by the side of your body

• Lift your hips up by squeezing your bottom till your back is straight (Picture 2)

• Hold this position for 3-5 seconds and lower your hips back down to the floor and repeat

5. Leg and arm raises

• Start by lying on your front on the exercise mat

• Place your arms straight above your head and legs hip width apart

• Lift opposite hand and leg about 30-40 cm off the floor at the same time
My leg is lifted too high off the floor on this picuture, so don't lift as high as I do here:)

• Try to reach forwards with your hands rather than lifting too high

• Keep facing down to relax your neck

• Do 10-15 repetitions on opposite leg and arm and then change

6. Core activation

• Start by lying on your back on the exercise mat

• Place your hands under each side of your lower back

• Pull your belly button down towards the floor and push your lower back down so your hands gets a firm squeeze

• Hold this position for 5-8 seconds, relax and repeat 15 repetitions

NB! Please be aware that isometric exercises can lead to an increase in blood pressure and may therefore not be suitable for people with hypotension

7. Front plank (isometric exercise)

• Start with your toes and elbows/forearms on the mat (Picture 1)

• Your toes should be placed shoulder width apart and your elbows shoulder be placed shoulder width apart in line with the top of your shoulders

• Make sure your abdominals are pulled and that hips are parallel to the floor throughout the exercise

• There is no movement during this exercise

• Hold the starting position between 20-40 seconds (without letting your hips drops or raise up)

• Relax between 120-180 seconds between your sets and repeat 3 times

---------------------------------------------------------------------------------------------------
Always warm up with 5 minutes of easy mobility movements such as side bends, upper back rotations, arms swings etc.
Always cool down after the workout with 5-10 minutes of stretching for the main muscles used in the work out. In particular your lower back and the side of your back. Hold each stretch for 20-30 seconds and do 2-3 sets of each stretch

Cheers

MoTo :)

Saturday, 25 September 2010

WARM UP - Specific to what you are going to do!

Warm up is a theme coaches and trainers have debated and discussed for years. RAMP is a common acronym when discussing warm up, and the letters stands for - Raise, Activate, Mobilise and Potentiate. In simple terms the warm up is there to prepare your body for what you are going to do next! If you are playing football, basketball, rugby etc this will involve a lot of running and a lot of change of direction, so to raise the body temperature, heart rate and mobilise the joints is crucial. Some coaches still use the old line: "Run around the pitch twice". However is running around a pitch twice ticking all the boxes that a warm up should include? I don't think so. How about including some functional mobility exercises as part of the warm up to make sure your joints have been taken through range of movements they are likely to be working through in training/match?

I think that mobility exercises as part of anyone's warm up is underrated. I will therefore describe some simple mobility exercises that athletes can include as part of their warm up whether this is for a team sport or before lifting weights in the gym.

Type: Mobility warm up exercises to prepare the body for exercise
Purpose: To improve blood flow to the working muscles and increase mobility of the joints
Suitable for: Tennis players, team sports and individuals
Equipment needed: Mini resistance band
Repetitions and sets:
1-2 sets per exercise
10 - 15 repetitions per exercise

1. Hamstring walkouts

Start by standing with your feet at hip width apart
Lean your upper body forward without bending your knees and touch the floor (if you have tight hamstring you can bend them slightly) (Picture 1)From this position walk yourself forward by using your hands until you get to a press up position (Picture 2)
From this position walk your hands back till your hands touch your feet and repeat
Your feet stays still throughout the exercise
Keep your hips still and avoid rocking too much from side to side
Perform this movement 10-15 repetitions

2. Lunge with twist
Start by standing with your feet about hip width apart on the floor
Pull your abdominals in and keep your chest out prior to starting
Let your hands rest comfortably on the side of your body
Step forward in a lunge position by bending both knees is in line with your ankle
Your front knee should not cross the line of your toes and your back knee should just touch the floor gently
With the hand on the same side as your front leg touch the inside of your front leg(Picture 1)
The other hand opens up outwards and make a half circle
Push your front leg back up and step back to the starting position, repeat with the other leg
Remember to always touch the front foot with the hand on the same side as the front leg
Repeat 8-12 steps on each leg

3. Squat, touch toes, hands up and stand up
Start by standing with your feet about hip width apart
Front this position lean forward and touch the inside of your big toes without bending your knees (if you have tight hamstring muscles you can bend them slightly) (Picture 1)
While holding onto the inside of your foot, squat down by bending your knees till your bottom is in line with your knees (Picture 2)When you get into this position, lift one hand up above your hand (Picture 3) and then the other hand (Picture 4)You can then straighten your knees, stand up into the starting position and repeat(Picture 5)
Make sure you keep the weight onto your heels throughout this exercise
Repeat 10-15 times

4. Side lunges
Start by standing with your feet about hip width apart on the floor
Pull your abdominals in and keep your chest out prior to starting
Lift your arms in front of your body till about chest height
Step out till the side with your right leg by bending your right knee.
Keeping your arms in front of your body to counterbalance and make sure your knees are pointing forwards
Stick your bottom back and keep your chest out while getting into the position (Picture 1)
From this position, drive your right leg back by pushing it off the floor into the starting position and repeat
You can alternate from side to side or do all your repetitions on one leg before changing to the other
Do 8 – 12 repetitions on each leg


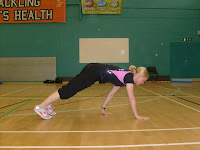
5. Press up position to rotation

Start on the floor in a press up position with your elbows in line with your shoulders
Keep your abdominals pulled in prior to starting this movement
From this position, lift your left hand off the floor and make a half circle by rotating to the left (Picture 1)You left hand should be in line with your body when looking from the side
Rotate your body back down to the starting position and repeat on the other side
Do 8-12 repetitions on each side

6. Spiderman

Start on the floor in a press up position with your elbows in line with your shoulders(Picture 1) Keep your abdominals pulled in prior to starting this movement
Bend your right knee and take a step forward with your right leg, place your right foot next to your right hand
To increase the stretch behind your lright leg you can touch the left elbow down onto your left foot (this is optional)
Lift your left leg back to the starting position and repeat on the other side
Do this 10 – 15 repetitions on each leg

7. Glut bridges

Start by lying onto your back on the floor
Bend your knees by placing your heels in line with your knees (half a foot away from your bottom)
Rest your arm by the side of your body (Picture 1)Lift your hips up by squeezing your bottom till your back is straight (Picture 2)Hold this top position for 5 seconds and lower your hips back down to the floor and repeat
Do this 10 -15 repetitions
8. Windmill
Start by standing with your feet about 1 metre apart
Bend your upper body forward by slightly bending your knees
Touch your right hand on the outside of your left foot (Picture 1)Change over and touch the left hand on the outside of the right foot and repeat for 10—15 repetitions
Keep your chest out throughout this exercise


9. Hip flexion with mini resistance band

Start by laying on your back with the resistance band around the top of your feet (point your toes upwards to make sure the band doesn’t come off) (Picture 1)Bend right hip by bringing your right knee towards yourself till your hip is at approximately 90° (Picture 2)Keep the right leg straight while moving the left leg
Bring the left leg back down by straightening your hip and knee and repeat with the right leg Repeat this 10-15 times on each leg
10. Shuffles with mini resistance band (forwards, sideways and backwards)

Start by placing a mini resistance band around both knees together
Stand with your feet hip width apart, with a small bend in your knees prior to starting
Take a step forward with left leg, then move the right leg close to the left leg (Picture 1)Now move the right leg forward before moving the left leg close to the right leg etc.
To move the front leg you have to abduct (bring the leg out) the leg against the resistance band, which means you should face sideways slightly before starting
Always remember to bend your knees and keep your chest out when doing these movements
You can also walk sideways (Picture 2) and backwards with the band (Picture 3), by changing the starting position
If you alternate between the 3 different movements you can perform this for approximately 5 minutes
Thanks
Monica